- CALL (856) 265-0628


Setting Up Your Email Account In Mozilla Thunderbird
- Open Mozilla Thunderbird.
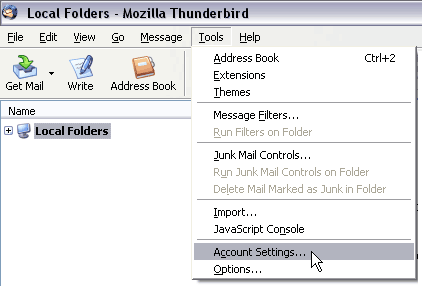
- Select 'Account Settings...' from the 'Tools' menu.
- Choose 'Email Account'.
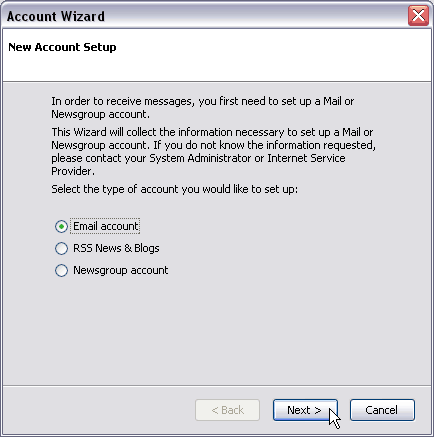
- Click 'Next'
- Enter your name and email address into the 'Identity' window.
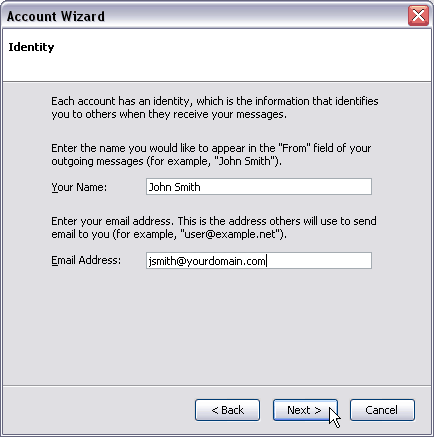
- Click 'Next'.
- Choose 'Pop' and enter your incoming server address, which is mail.yourdomain.com.
Be sure to replace yourdomain.com with your actual domain name.

- Click 'Next'.
- Enter your email address as the username, address@yourdomain.com, for both incoming and outgoing accounts.
Again, be sure to replace yourdomain.com with your actual domain name.
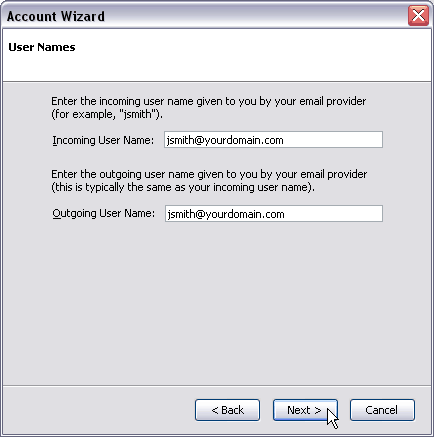
- Click 'Next'.
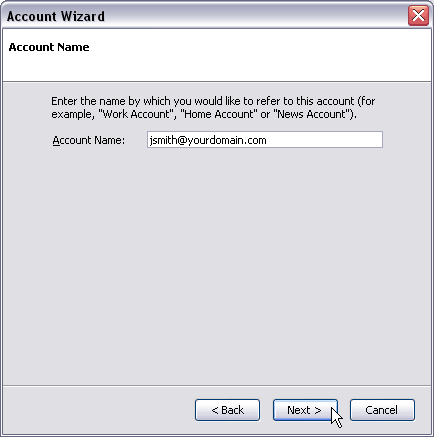
- Enter a descriptive name for your account name. For easier viewing later we recommend setting this to the actual email address you are setting up. This will make it easier to find later if you have many email accounts to set up.
- Click 'Next'.
- At the 'Congratulations' window, click 'Finish'.
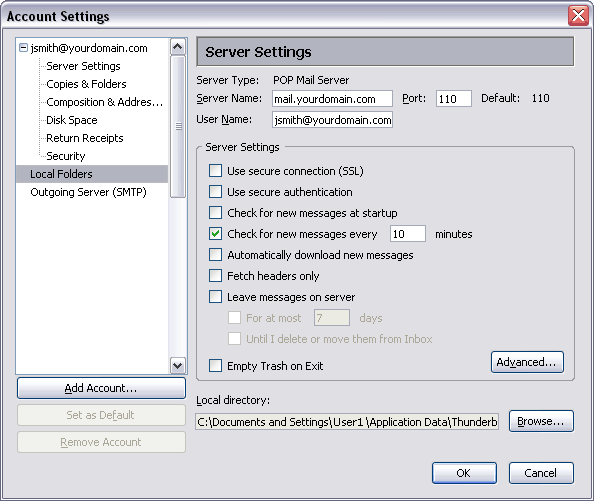
- You will now be back at the 'Account Settings' window. Find your new account in the list to the left and click on 'Server Settings'. Verify that the 'Port:' setting is at 110. Here you can set various options for your account, such as checking at specific time intervals, downloading only the mail headers, saving email on the server and more.
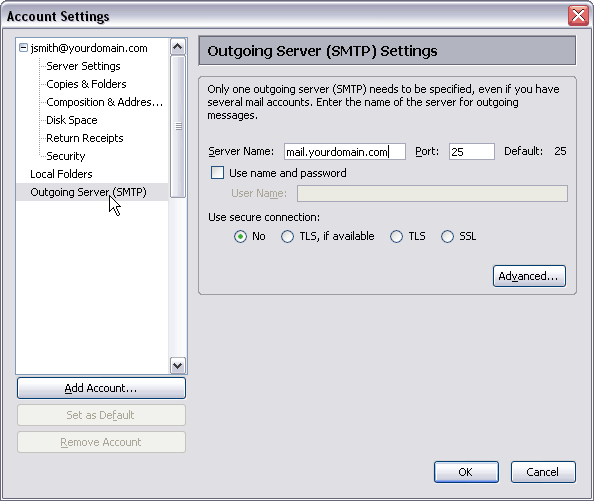
- Click on 'Outgoing Server (SMTP)'. Here you can enter your outgoing email settings. Enter mail.yourdomain.com as the 'Server Name:'. Make sure the 'Port:' is set to 25. You do not have to enter a username right now. Leave the 'secure connection' as No.
- Click 'OK'.
- That should be it! Test out your new email address in Thunderbird by sending yourself an email from your ISP address or have a friend send you an email. Also try sending an email out to someone else. The first time you send email it will ask for a username and password. For your username be sure to enter your entire email address, including the '@yourdomain.com' portion. Use your password supplied to you in your sign up email. Be sure to click the 'Save this email' check box so you don't have to enter the information each time you send an email. Should you have any trouble please contact our support staff.